Monday, June 27, 2016
Sunday, June 26, 2016
Saturday, June 25, 2016
Sunday, June 19, 2016
One of the Best Underwater/Waterproof speakers by AYL
Friday, June 17, 2016
Check out this “squatting lobster” I pictrued in Raja Ampat,...

Check out this “squatting lobster” I pictrued in Raja Ampat, Indonesia.
Saturday, June 11, 2016
The clothing labels are having greater benefits among designers and crafters to make best business...
Friday, June 10, 2016
Sew on Labels made by CBF
Sew on Labels by CBF Labels
Simple ways to save on your custom sew on clothing labels.
Keep it Simple. Simple custom sew on clothing labels with only a few colors will go a long way. Or if you are interested in custom printed labels, each color (aside from the ribbon color) is one custom plate. Each plate has its own one-time cost, making elaborate designs more costly initially.
Think Small – But Not Too Small. In most custom labels (printed labels, woven labels, hang tags, or any other custom clothing label) the smaller the better. Having a small sew on clothing label can often keep costs down. However, be careful how small, because having a very small custom label can actually increase your cost. This is normally true for custom woven labels.
Plan Ahead. Many times customers are in a rush for their custom sew on clothing labels. Often these clothing labels are a last minute thought. While, we have very fast production times, customers in a rush for their labels generally need the shipping rushed resulting in higher delivery costs sometimes five times the cost. Planning ahead and preparing vectored artwork to scale with plenty of time for sampling and production will help reduce both shipping costs and even production time.
Thin, Thin, Thin. Custom hang tags can get very costly depending on the intricacy and details of the custom clothing tag. Like with keeping the labels simple, keeping the hang tag thin rather than using a thick bulky card stock, will keep the cost low. The thinner stock is less expensive to produce and will also cost less to ship since it is not as heavy and bulky.
Strength in Numbers. The best way to save money on custom sew on clothing labels is to run in large bulk quantities. The greater the quantity the more efficient the process gets, this makes it easier to reduce costs and give the customer the benefit of that cost reduction. This is especially true of custom woven labels due to the production being created in huge sheets on a loom.
For more on tips on how to save with items like sew on clothing labels just give us a call or fill out our contact form, we’re here to help! Fill out our contact form and we will get back to you in 24 hours or less.
The post Sew on Labels made by CBF appeared first on CBF Labels Inc.
Monday, June 6, 2016
Thursday, June 2, 2016
Tissue Paper Flower Letters
Today’s contributor is Emma from Crafting{E}! All posts written by Emma for Make It and Love It, can be found HERE.
. . . . .
Hello everyone, it’s Emma from Crafting{E}! I hope you all are having an amazing week!

I am currently on my summer break (yay!) and that means several things. One thing it means is, I finally have more time to work on fun projects like this. It also means that I am CRAVING more color in my life. Has that ever happened to you? I just have this urge to make everything I see bright and colorful.

Last week I ran into Target (which is something I frequently do) and I saw this tissue paper in these fun, bright colors. I ended up buying it even though I had no idea what I would use it for.

I ended up making that tissue paper into an adorable “E” letter with tissue paper flowers. Floral is SO in right now and I personally love it. I love how the flowers look on the letter. Adorable!

These letters are great for several things. They are perfect for decorating any space. They would also make a great party decoration or a photo shoot prop. The other great thing about these letters are that they are so versatile. You can change up the colors to make them fit for any holiday or occasion. How perfect would the letters “USA” be with red, white, and blue flowers for Independence Day?

Okay, you guys are going to love how easy these are to make.
MATERIALS:
- Tissue paper (mine is from Target)
- Wooden letter.
- Scissors
- Stapler
- Hot glue
DIRECTIONS:
For my letter I made three different types of flowers. I will show you how to make each kind below. I also made my flowers two different sizes. For the larger flowers I used 1/2 of a sheet of tissue paper and for the smaller flowers I used 1/4 of a sheet of tissue paper.
FLOWER #1

- First, take your piece of tissue paper and fold it until it is roughly the size you want your flower to be.

- Then, cut off part of the longer side of tissue paper so it is the shape of a square.

- After, put a staple into the middle of your square of tissue paper.

- Next, cut your square into a circle and then cut little triangle shapes out of the the edges of the circle.

- Fluff the tissue paper until the desired look is achieved.
FLOWER #2
- First repeat the steps from the first flower up until it says to “cut little triangle shapes out of the edges of the circle”. Instead of cutting triangles out of the sides of the tissue paper, cut the tissue paper into a flower shape.
- Then fluff until the desired look is achieved.

FLOWER #3
- Again, repeat the steps from the first flower up until it says to “cut little triangle shapes out of the edges of the circle”. This time instead of cutting the triangles cut fringe onto the sides of the circle.

- Then, fluff the tissue paper

Once you have created all the flowers for your letter, simply hot glue the flowers onto the top of your letter.

And that’s it! Thank you so much for reading! Make sure to check out my personal blog for more projects like this one and make sure to follow me on pinterest for EVEN MORE great ideas.
-Emma

. . . . .
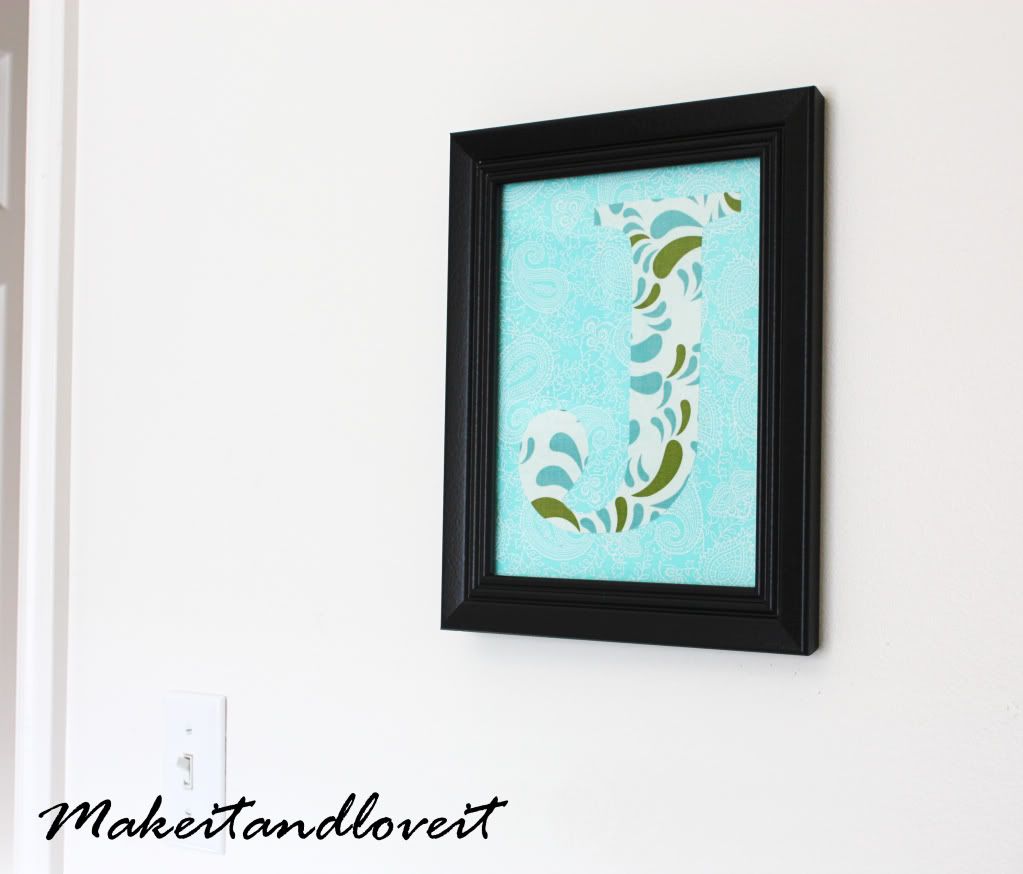
Decorating with monograms is a great way to personalize your space! Check out a few more fun ideas using letters, and put a little “you” into your space:
“Mr & Mrs” Wall Display…fun master bedroom decor!


Wednesday, June 1, 2016
DIY Reclaimed Wood Planter Box (…for an upright Fairy Garden!)
Oh my word……it’s summertime here in Oklahoma! I know summer doesn’t officially begin for 3 more weeks, but I feel like it’s been summer for at least a month or two already. The weather here has been so warm and beautiful (except for a few severe thunderstorms and tornadoes), so we’ve been outside, A LOT!
When I found out our Michaels Maker theme for this month was “summer parties”, all I could think about was simple backyard parties…..whether we invited friends over for a BBQ, or were just enjoying this weather as a family! So, I wasn’t looking to create anything too extravagant in the backyard…..just a few things to make the space happy and inviting, even if was just us out there, enjoying the nice weather and sitting out on the patio for dinner.
So, I bought several pots of flowers, moved a few things around, strung some oversized lights from the patio ceiling…..and ahhhhhh, it just feels so nice to walk outside the patio door!

And because I couldn’t keep from making at least something, we turned some old wood fence pieces (that we got from a friend who was replacing their fence…thanks Monica!) — and turned it into a Reclaimed Wood Planter Box, for an upright FAIRY GARDEN!!

Oh yes, a Fairy Garden for the kiddos to admire, rearrange, and create stories around……all summer long! They’re excited to water and care for it too…..because everything in there is living, except for the little homes and figurines (which we bought at Michaels).

Pots of beautiful blooming flowers, twinkling lights overhead, and a magical fairy garden…..that’s how we’ll be enjoying our lazy summer evenings!

And you guys, old wood fences should never be thrown away! The wood has perfectly weathered after years and years of rain and rust…..which gives you the perfect color, with so much character. Once we started piecing it together, I was so excited about the whimsy it was adding to this little Fairy Garden, right outside our back door!

Nothing is perfect about weathered wood….but that’s what makes it “perfect”. You can build so many things from it too…..so I made sure to save everything we didn’t use, for another project!

We added a top ledge to the planter that could have been mitered together, but I really liked the simplicity of just matching up the squared corners and nailing it in place.

This large planter (about 30 x 23 x 30 inches) could easily house very large plants or house trees….but since we only planted the small succulents and moss, we didn’t need room for large roots. So I filled most of it with old styrofoam (so it wouldn’t be so heavy) and then only about 5 inches of soil on top. But those little plants in there still need water, so the planter is up on little legs, to allow drainage through the slats in the wood.

You really could make a planter of any size for your Fairy Garden (or even purchase a large flower pot)…but we wanted it high enough off the ground so that little ones (like Oliver) couldn’t grab pieces, but low enough for the older kids to touch and admire.

And oh my goodness, we have been having so much fun with it. The details of these pieces are just too sweet. My girls have already been creating story lines of what the fairies might do at night, when they come to “life”…..because yes, fairies are real, my friends! ;)
And just so you know, this little fairy, is Daisy. She is the guardian of all the small animals and insects in the garden.


And this guy? His name is Ronald.

Ronald is married to Marigold. And according to Chloe, they don’t like pets. They like gardening. And tea parties.

Ronald and Marigold live in the tree stump. And are neighbors with Bob, that little gnome over on the left, who lives in that mini mushroom house. Haha…..the stories I’ve been overhearing about Marigold, Daisy, Ronald, and Bob are pretty hilarious! :)

Back to the patio.
I’ve been wanting to hang lights from the patio for quite some time but figured I missed my opportunity to buy big bulb lights like these since Christmas has passed. But Michaels carries them as part of their “outdoor” decor and oooooh, they have so many styles to choose from.

They were just what I wanted. :)
So while the kids jump on the trampoline, kick the ball around, play with our pet bunnies, or continue the saga of “Ronald and Marigold”, our Fairy Garden fairies…….

……Steve and I can catch up on our day here on the patio chairs, as the sun goes down and the cooler night air starts swirling in. Ahhhhh….I love celebrating summer, even if it’s just our little family!

Would you like to make your own Planter Box from old wood or new…..both work!
SUPPLIES:
- Old Fence Slats (3 1/2 inch wide x 1/2 inch thick)….or any other type of wood you find
- Wood Glue
- Nail Gun (or hammer and narrow nails)
**My finished planter (including the upper ledge) measures 29 1/2 inches wide x 23 inches deep x 30 1/2 inches tall.
First of all, decide what type of wood you want to use. You don’t have to find old wood….this could definitely be made with new wood, but what’s the fun in that?! ;) But if you use wood that’s another width, these measurements will be different, so just use the following as a guide.
Okay, now if you’re using old wood, disassemble it and remove any old nails or screws. Only select the pieces that are still sturdy and set apart the pieces that are crumbling or cracked. We grabbed some old fencing sections from some friends that were replacing their fence. And while some pieces were not strong enough, there were plenty of pieces in the “keep” pile (for this and some future projects)! :)

Now, cut your pieces down to 18 inch long and 25 inches long, until you have enough to stack about 28 inches tall for 2 front sections and 2 back sections. (They don’t have to stack exactly 28 inches tall……just somewhere near that. You don’t want to have to rip and wood down because we’re trying to keep things simple. So, if your wood stacks less or more than about 28 inches tall, just remember that you might have to adjust the length of the vertical slats in the next step.)

Now, grab the 18 inch pieces and be sure you have the wood arranged just how you like it and then line them up nice and even. Cut 2 vertical pieces that are 30 inches long (or 2 inches longer than your stack of wood). Add a line of wood glue, place your vertical piece of wood along one edge, lining up the top and side edges, making sure that your slats are nice and snug together…..and then nail in place, several nails per slat.

Here’s the first side, all finished and nailed together, with the vertical slats hanging past the bottom edge about 2 inches.

Now, turn it over and add several more nails along each side to be sure everything is secure.

Repeat the entire process with the other 18 inch long pieces.
Now, arrange your 25 inch wide pieces but when you place the vertical slats on top, let them hang over about 1 inch on the sides. This will help you puzzle piece the sides together to create your planter shape. Nail down the same way and then flip over and nail along the back side as well.

Here’s a closer peek at the overhang from the back side. Repeat with the other 25 inch long pieces.

Now, stand your sides up and piece them together. (Okay, now I know this looks different from what I told you above because now the vertical pieces that overhang are now on the sides. But I ended up changing the measurements from what was actually shown in the pictures above but the numbers I told you are now accurate. I just didn’t want to have to take off the vertical pieces and start that over…..so I just made it work because I didn’t really care. But if you want the front pieces to have the longer overhang, just follow the instructions above.)

Now, because of the overhang, your corners will fit together nicely, hiding the horizontal wood slats beneath them. Now, nail all of your corners together.

Now, for extra stability, grab a 2×3 (or any other thicker piece of wood from your scrap pile) and attach them to the inner corners with screws. This will give the corners a good sharp 90 degree angle and will offer support. But I decided to drop them down about 1 1/2 inches from the top edge so that they wouldn’t be noticeable and would be covered with dirt.

Now, flip the entire thing over and cut more slats to fit across the bottom of the planter. Add wood glue and then nail in place.

To hide the wood slats that you used to create the bottom of the planter, measure and cut one more wood slat to fit at the very bottom of the planter, between the two vertical pieces. Repeat along all four sides.

Turn back over and cut 4 more pieces to create a top ledge for your planter. We placed each piece so that they overlapped 1/2 inch towards the inside opening of the planter. Glue and nail in place.

And that’s it! Your planter is ready to be filled. You can either line it with plastic or landscape fabric to help eliminate leaking through the wood slats…..or let the cracks in the wood slats act as your drainage. I knew we wouldn’t be placing any large plants inside of this planter that needed room for root expansion, so I filled the majority of the planter up with old styrofoam that we had in the garage, so that it wouldn’t be so heavy with dirt. Then I added about 5 inches of potting soil to the top and then planted all of the small plants for our fairy garden.

Enjoy!
-Ashley
. . . . .
For other “Summer Celebration” ideas, check out these other Michaels Maker ideas: